
Axios
뷰에서 권고하는 Promise 기반 HTTP 통신 라이브러리이다.
CDN 방식 또는 NPM 방식을 통해 사용할 수 있다.
<script src="https://unpkg.com/axios/dist/axios.min.js"></script>
예제
<!DOCTYPE html>
<html lang="en">
<head>
    <meta charset="UTF-8">
    <title>Document</title>
</head>
<body>
    <div id="app">
        <button v-on:click="getData">get user</button>
        <br>
        <div>{{ users }}</div>

    </div>

    <script src="https://cdn.jsdelivr.net/npm/vue@2/dist/vue.js"></script>
    <script src="https://unpkg.com/axios/dist/axios.min.js"></script>
    <script>
        new Vue({
            el: '#app',
            data: {
                users: []
            },
            methods: {
                getData: function() {
                    var vm = this;
                    axios.get('https://jsonplaceholder.typicode.com/users/')
                    .then(function(response) {
                        console.log(response);
                        vm.users = response.data;
                    })
                    .catch(function(error) {
                        console.log(error)
                    })
                }
            }
        })
    </script>
</body>
</html>https://jsonplaceholder.typicode.com
JSONPlaceholder - Free Fake REST API
{JSON} Placeholder Free fake API for testing and prototyping. Powered by JSON Server + LowDB. Tested with XV. As of Oct 2021, serving ~1.7 billion requests each month.
jsonplaceholder.typicode.com
JSON 데이터를 불러올 때 시험하기 좋은 사이트이다.
해당 사이트에서 GET 방식을 이용해 데이터를 불러온다.
console.log를 통해 response 값을 출력한다.

데이터가 잘 받아져 왔다면 콘솔 창에 위와 같이 Object가 출력된다.
그중에서 data에 들어있는 user 정보만 불러올 것이기 때문에 response.data를 vm.users에 저장한다.
이때 this.users를 사용하지 않고 vm.users를 사용했다.
axios.get() 호출 전 this와 호출 후 this가 가리키는 것은 다르다.

console.log(this)를 사용해 this를 출력해보면 axios.get() 호출 전 this는 기본적으로 컴포넌트를 바라보기 때문에 Vue이다. axios.get() 실행 후 this는 Window 값으로 나온다.
따라서 axios 전 this(Vue 인스턴스)를 변수에 저장해놓은 뒤 해당 변수를 통해 뷰 인스턴스의 data에 접근하는 것이다.
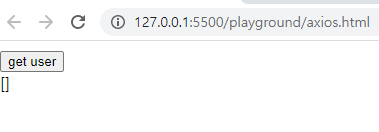
첫 화면에는 users에 아직 아무 값도 저장하지 않았기 때문에 빈 배열로 나타나 있다.
get user 버튼을 클릭한다.
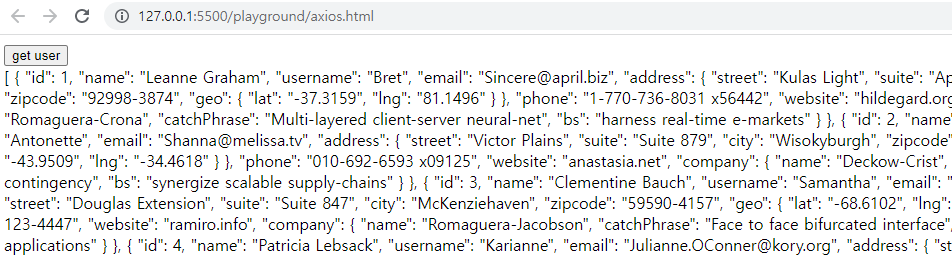
axios.get().then을 통해 가져온 정보들을 화면에 띄울 수 있다.
[인프런] Vue.js 시작하기 - Age of Vue.js
Axios
뷰에서 권고하는 Promise 기반 HTTP 통신 라이브러리이다.
CDN 방식 또는 NPM 방식을 통해 사용할 수 있다.
<script src="https://unpkg.com/axios/dist/axios.min.js"></script>
예제
<!DOCTYPE html>
<html lang="en">
<head>
    <meta charset="UTF-8">
    <title>Document</title>
</head>
<body>
    <div id="app">
        <button v-on:click="getData">get user</button>
        <br>
        <div>{{ users }}</div>

    </div>

    <script src="https://cdn.jsdelivr.net/npm/vue@2/dist/vue.js"></script>
    <script src="https://unpkg.com/axios/dist/axios.min.js"></script>
    <script>
        new Vue({
            el: '#app',
            data: {
                users: []
            },
            methods: {
                getData: function() {
                    var vm = this;
                    axios.get('https://jsonplaceholder.typicode.com/users/')
                    .then(function(response) {
                        console.log(response);
                        vm.users = response.data;
                    })
                    .catch(function(error) {
                        console.log(error)
                    })
                }
            }
        })
    </script>
</body>
</html>
https://jsonplaceholder.typicode.com
JSONPlaceholder - Free Fake REST API
{JSON} Placeholder Free fake API for testing and prototyping. Powered by JSON Server + LowDB. Tested with XV. As of Oct 2021, serving ~1.7 billion requests each month.
jsonplaceholder.typicode.com
JSON 데이터를 불러올 때 시험하기 좋은 사이트이다.
해당 사이트에서 GET 방식을 이용해 데이터를 불러온다.
console.log를 통해 response 값을 출력한다.
데이터가 잘 받아져 왔다면 콘솔 창에 위와 같이 Object가 출력된다.
그중에서 data에 들어있는 user 정보만 불러올 것이기 때문에 response.data를 vm.users에 저장한다.
이때 this.users를 사용하지 않고 vm.users를 사용했다.
axios.get() 호출 전 this와 호출 후 this가 가리키는 것은 다르다.
console.log(this)를 사용해 this를 출력해보면 axios.get() 호출 전 this는 기본적으로 컴포넌트를 바라보기 때문에 Vue이다. axios.get() 실행 후 this는 Window 값으로 나온다.
따라서 axios 전 this(Vue 인스턴스)를 변수에 저장해놓은 뒤 해당 변수를 통해 뷰 인스턴스의 data에 접근하는 것이다.
첫 화면에는 users에 아직 아무 값도 저장하지 않았기 때문에 빈 배열로 나타나 있다.
get user 버튼을 클릭한다.
axios.get().then을 통해 가져온 정보들을 화면에 띄울 수 있다.
[인프런] Vue.js 시작하기 - Age of Vue.js